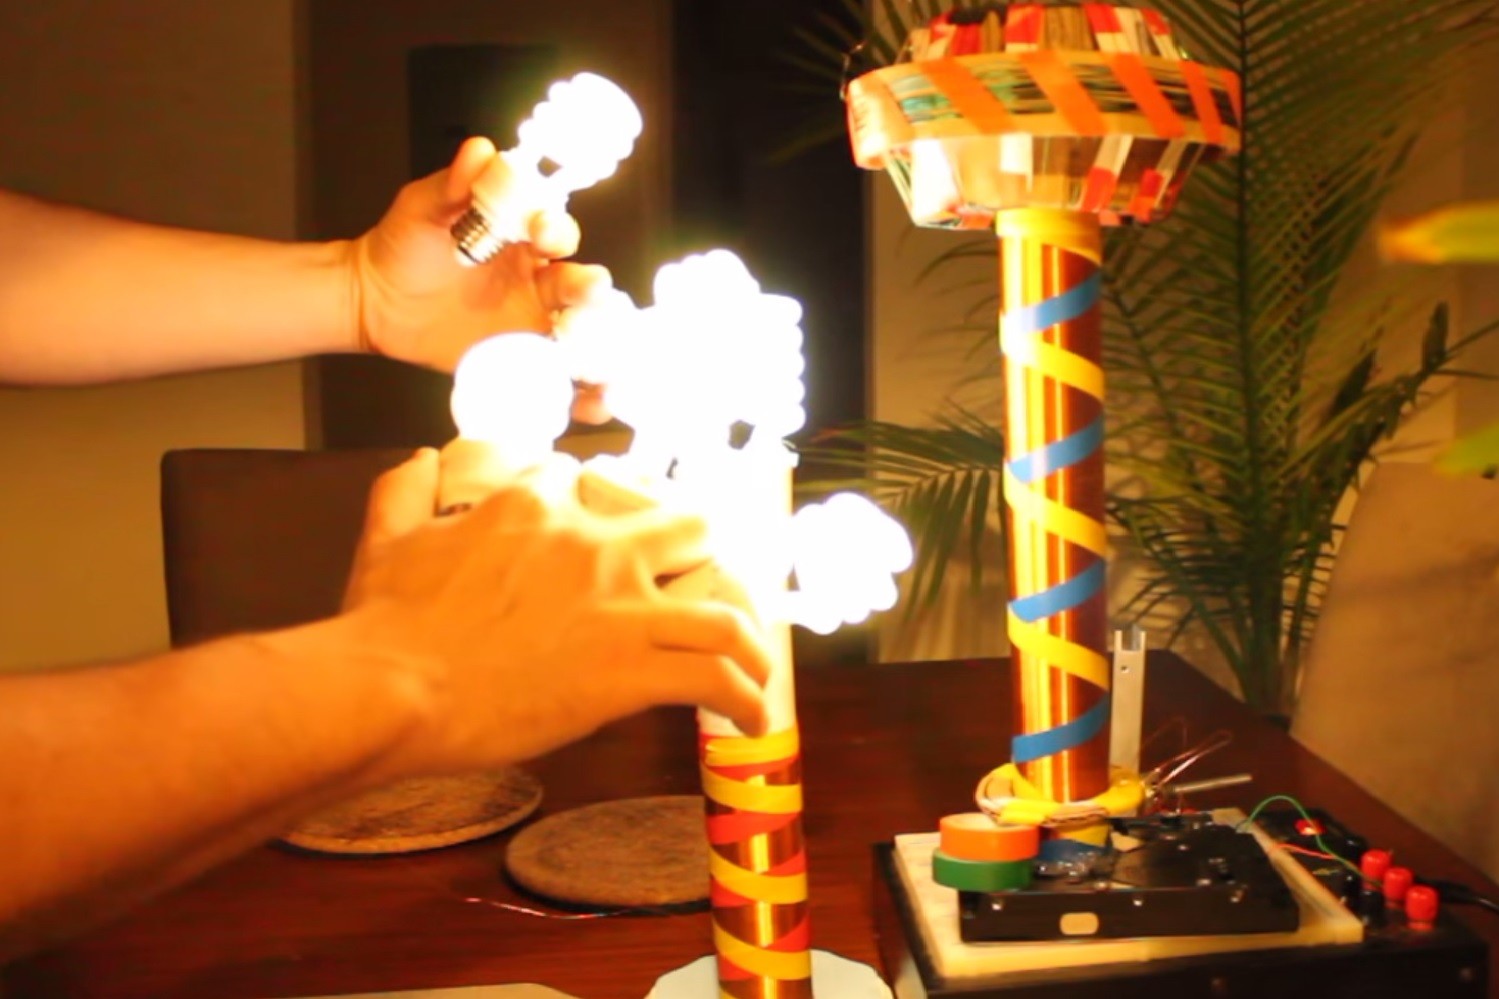
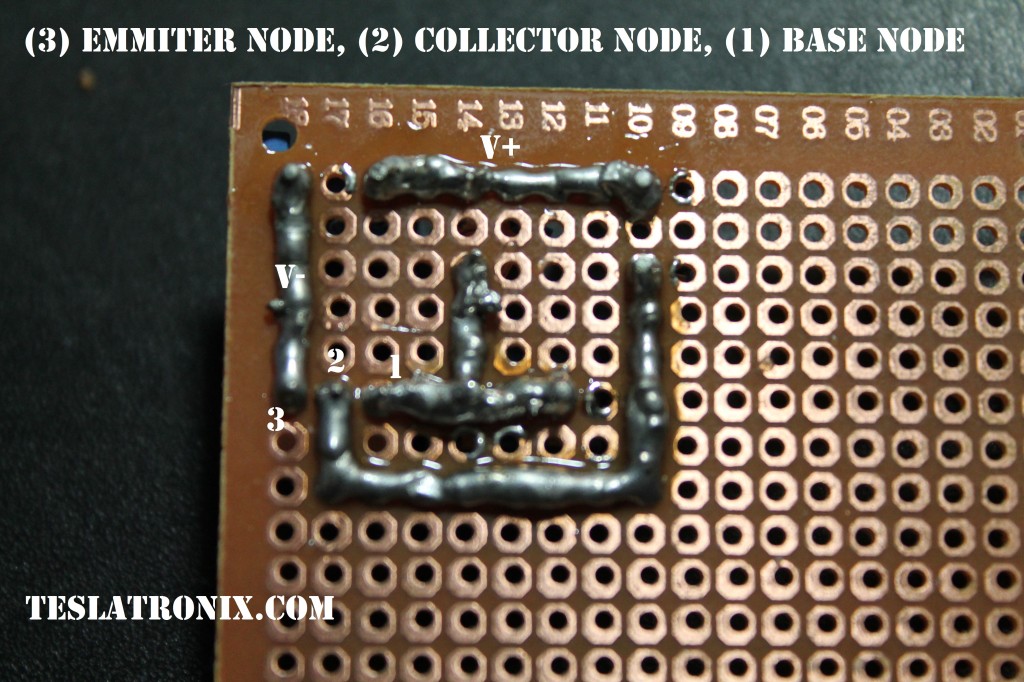
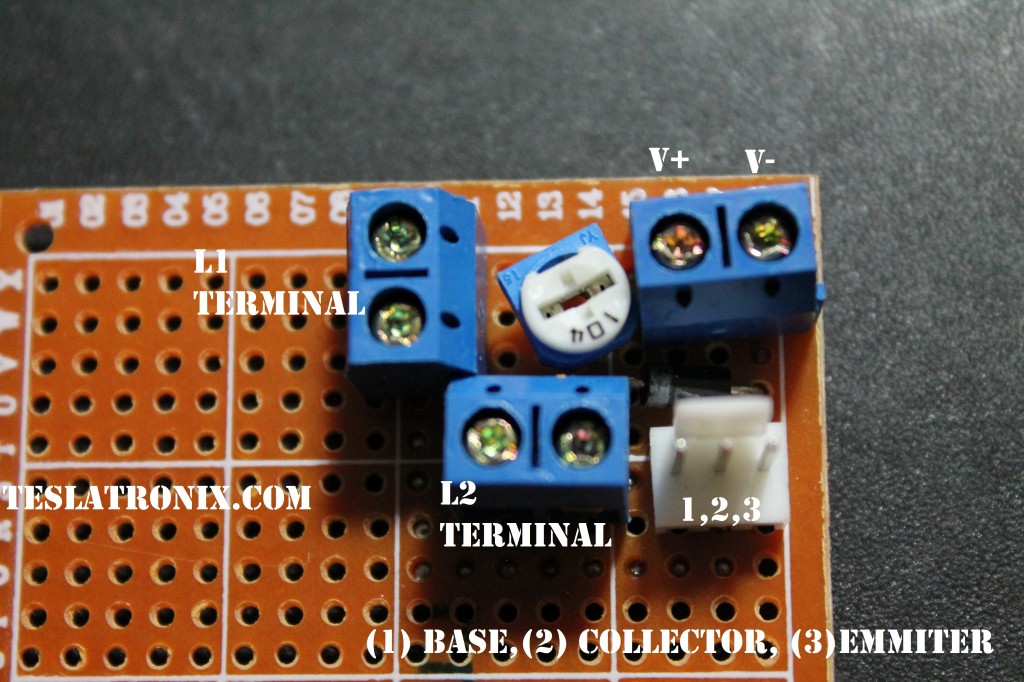
An example of the TeslaTronix solid state Tesla coil circuit board:
The resistor or potentiometer leads from V+ to the base of the transistor, and the reverse facing diode also leads from the base of the transistor node to ground.
The terminals for L2 are soldered together as one node, so you can connect the L2 to either terminal. L1 terminals ARE NOT soldered together. L1 is in series with V+ and the collector node. One benefit to having 2 terminals is the ability to easily add and remove an additional secondary, or L3. The voltage at this node will also excite a second tower if enough input current is present.
The driving circuit itself is tiny, and with enough ingenuity, you can probably get it to fit on a PCB the size of a quarter! Solutions can easily be made etched, or not etched on standard project board.. or of course on any breadboard. Actually, it is recommend to assemble your circuit first on a breadboard. A good heatsink is key. Never run your circuit without a heatsink. Would you run your desktop PC without a heatsink? Increased longevity and increased input voltages are also advantages of a large heatsink properly secured with thermal paste. Preferably, the heatsink should be positioned parallel to the base, to keep it from absorbing high levels of feedback from the L2/C.


I am makeing a tesla coil for a high school physics project but i am having trouble figuring out the parts in the circuit board video. I think I have to pay for the schematics and the parts list but I don’t know where to do that. I have everything I need to make the coils an a power supply but I still need to figure out the different kind of resistors, diodes, and transistors to use. If you can help me out I would greatly appreciate it.
So there is nothign going to the emitter of this circuit. Could we see a diagram, by the way tronix, love this setup.
Hi there,
The schematic is found in the video here:
http://www.teslatronix.com/theory-of-operation/
How long is shipping time to australia
Depends, usually takes a couple weeks. All items ship via USPS.
Is there anyway to buy just a parts list and instructions and have those emailed to us? My friend and I want to do some research on wireless electricity for a physics investigation in high school and the shipping will take to long to reach us. Is it possible to have this or maybe express postage if we pay more? Thanks
I was also wondering about this as I am in a similar situation to angus.
A downloadable portion will be available tonight.
I am terrible at soldering and don’t own a soldering iron. Is there any way I could purchase the circuit board pre-soldered/assembled?
I am interested in purchasing the assembled circuit board as well, if available. I have already purchased the kit, have wound the coil, etc, but the board is tricky for me unless I see it all put together, and exactly what goes where.
Hello and thank you for the recorces! I was hopping you could send me a picture or post one of the basic Curcuit on a bread borad. Thanks for the help.
I’ve constructed the coil as per instructions, and it works! Thank you very much! I believe that the specs of the coil are that it is “rated” for up to 30 Volts DC, .5-1 Ampere. How could you bump this circuit up the the “next level,” or are we at the upper limit for such a simple circuit? (e.g., use of Darlington or Sziklai pairs????) I understand that it may be more technical than this. Just thought I’d get your thoughts. Thanks!
Specifications for the tip31 max at about 30V. Similar theory can be applied for higher powered systems.
I’m in the same boat as most of the people on this thread. I too would love to see a pic of the finished circuit board
I am not sure what you are asking, the finished circuit board is pictured above.
I bought a kit from you and I am putting together my bread board. I got a potentiometer in the kit that I do not know what to do with. In the video I got from you on how to put it together you mention one of the three pin on the potentiometer has to be bent back. How do I identify which pin has to be bent back? I have a analog voltmeter as recommended in the videos.
Also do you have examples of using the test board provided in the kit?
thanks,
rd
Greetings,
I know it was stated that the 3rd pin has to be bent back, but in reality you can solder that third pin to the board, and not connect it to anything and that will make that component more stable.
If you are looking at the underside of the pot, there are 2 pins that are on the same line, then the 3rd pin kinda forms the point of an arrrow if you were to draw one around the pins.
To use the potentiometer, the voltage drop can be observed across the lone “arrow point” pin, and one of the other 2 pins. To confirm this, set your multimeter to ohms, and test your reading from the third pin to either of the other pins.
The optimal resistance for our Tesla coil kits is about 20-25Kohms.
Unfortunately, there are no photos available for the breadboard layout. Just like the PCB, there are may options in part placement. Try to think of the individual rows on the breadboard as individual nodes.
For example, on one of those nodes, you will have the base pin to the transistor, the – (negative) end of the potentiometer, the + end of the diode, and the – end of L2.
Hi can i use a TIP33/34C instead of the TIP31C?
Thanks,
RV
Yes
Are you able to see a plasma spark with this setup? would really like to wow the teachers with this as a project.
Without a top load on the L2, yes. Free standing from the top load? No. However plasma can be excited from the top load as demonstrated in the video:https://youtu.be/KQ2jlRu4UV4